Frequently Asked Questions
Wall Tents
What material should I get?
For almost 60 years, the Davis family has been making tents in Colorado. Through these decades the three critical factors that go into making the highest quality tents have remained constant, they are:
- Cotton Canvas
- Fabric Treatments
- Canvas Construction
100% cotton is the preferred canvas for tents. WHY 100% COTTON? The answer is simple, it allows the canvas to breathe. The reason breathability is so important is to minimize and eliminate condensation within the tent. Just 4 people in a tent produce 2 liters of condensation from their breath in one night. Add to that other elements that put moisture into the air; boiling water, heating with propane, and drying your clothing and you create a wet interior. Properly treated cotton allows this moisture to escape through the tent, keeping you warm and dry.
Together with the material itself canvas treatments have become a critical factor in determining a high quality from a lesser quality tent. SunforgerR has been the leader in the fabric treatment industry for more than 50 years because of its ability to retain the canvas’ natural ability to breathe. SunforgerR is also able to do this without contributing to the fabric’s disintegration.
For more information on materials and treatments see our Canvas Information Page.
Which pole system is best?
Some like the traditional poles better, some the internal frame. Both have up’s and downs.
This boils down to personal preference or how you are going to use the tent. For long term use a frame is more desirable as it offers an open space floor plan and more places inside the tent to hang items such as organizers and clotheslines.
For people who are packing in on Mules or ATVs the way to go would be the traditional poles. They pack down smaller and weigh about half as much.
If you want the internal frame and we are shipping the tent to you, save money and order “angles only”. We will send you a “cut list” and you can get the conduit at your local Home Depot and save a bunch on the shipping.
Internal Frame:
Here is a link to a video tour on how to set up the frame tent
Traditional Poles:
Here is a link to set up instructions for the traditional poles
-

Complete 4 Column Internal Frame
Price range: $599.00 through $843.00 Select options This product has multiple variants. The options may be chosen on the product page -

Traditional Pole System
Price range: $100.00 through $425.00 Select options This product has multiple variants. The options may be chosen on the product page
What size tent should I buy?
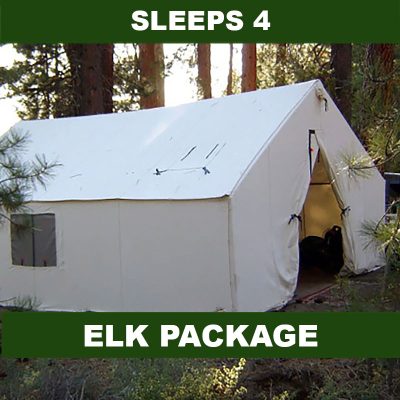
This is a hard question because everybody has their own idea of “comfort”. This is what we found works best for most of our customers. This includes a wood stove and a small eating area.
- 8 x 10 — 1 person (and maybe a small dog)
- 10 x 12 — 2 people
- 12 x 14 — 3 people
- 12 x 18 — 3 people and possibly a fourth
- 14 x 16 — 4 people
- 15 x 18 — 4 – 5 people
- 16 x 20 — 4 – 6 people
The recommendations above is for campers who will live in the tent for a week to ten day’s at a time. If the tent is going to be used for just a sleep tent you can add a person to all the tent sizes above.
If you are trying to decide between two sizes GET THE BIGGER ONE! You will thank me for it!
-
Canvas Tent with Stove (14′ X 15′)
Original price was: $2,740.00 – $3,069.00Price range: $2,740.00 through $3,069.00. Price range: $2,489.00 through $2,795.00Current price is: $2,489.00 – $2,795.00Price range: $2,489.00 through $2,795.00. Select options -
Canvas Wall Tents
From: $869.00 Select options
Should I "pre-shrink" my tent?
Great question with a mixed answer! The reason some people recommend this is that a tent is more likely to leak the first time it gets wet. This is due to the needle holes made when sewing the tent together. When new tents get wet, the cotton shrinks around the thread and seals itself. So setting your new tent up and wetting it down could be a good idea. HOWEVER, keep reading for why it might not be the best idea.
When setting up your tent to hose it down, you could end up with a shrinkage problem unless you set it up VERY well. When we say very well we mean the same as you would set it up for elk camp. This means you must use EVERY rope and stake, make sure the ropes are TIGHT, and be certain the stakes are SECURE (this might be a challenge on soft backyard lawns). Under these “real hunting world” conditions, your tent would seal itself and retain its size and shape.
We don’t tell our customers to “pre-shrink” their tents as most set it up properly at camp and never have a problem.
Note: On internal frame tents, the fit will “float” around a bit. Think of a pair of jeans coming out of the dryer and you think you cant button them; by the end of the day they are loose. Similarly, your wall tent will fit the frame differently at times.
Why don't you provide a tent bag with your tents?
Most users of our tents cook inside them, as a result grease and food is set on the canvas. Customers typically store out tent in the garage or attic; when this is done in a canvas bag the smell is not contained. When mice or some other varmint smells the food they will chew through the canvas tent bag and straight into the tent.
We recommend a hard container of some sort; a 33-gallon trash can with a lid or one of those giant plastic containers work best. Storing your (dry) tent in this type of container prevents critters from chewing on your tent, and can also protect it from other damage.
-

Wall Tent Bags
Price range: $30.00 through $75.00 Select options This product has multiple variants. The options may be chosen on the product page
What's the difference: Awning vs Porch vs Cook Shack?
We offer different lengths of all three:
Awnings – carries the roof line out over the front of the tent
Porches – the roof and walls out in front of the tent
Cook shack – the roof walls and another end sewn in
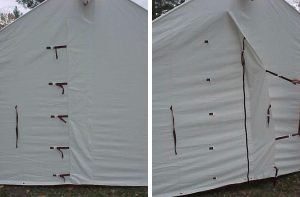
What is a Colorado door?
The Colorado door (AKA storm flap) is a combination of a zipper and a flap. The Colorado door also has buckles on the flap to hold it in place.
Here is a link to the Colorado Door video
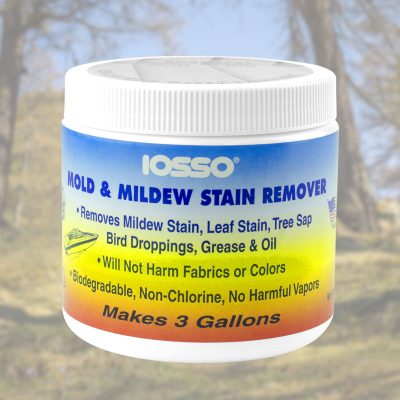
How do I get rid of mildew that is in my tent?
Once you have mildew in your tent is it always there. We can kill it to prevent it from spreading, and at the same time bleach it out so it is not such an eyesore. Eventually the tent will wear out at those places and might start to leak in those areas.
We offer ISSO Mildew and Stain Remover. Scrub infected areas. Let it dry then rinse very well and let dry.
A rain fly or waterproofing might be needed after you “kill” the mildew.
-

Waterproofing for Your Canvas Tent
Price range: $24.95 through $65.00 Select options This product has multiple variants. The options may be chosen on the product page -
Mold and Mildew Tent Cleaner
$24.00 Select options
I have a burn hole, now what?
The best way to fix burn holes is to sew a patch over them. What we try to do is wait until we have several tents (25 – 35) that need repairs and fix them all on the same day. The reason we do this is because the used tents make our shop dirty; after the day of repairs we can clean the shop and continue making new tents. So bring your tent in as soon as you can so you will get in on the next “repair day”.
We do not do repairs during hunting season!!!
We also offer a patch kit to repair small holes.
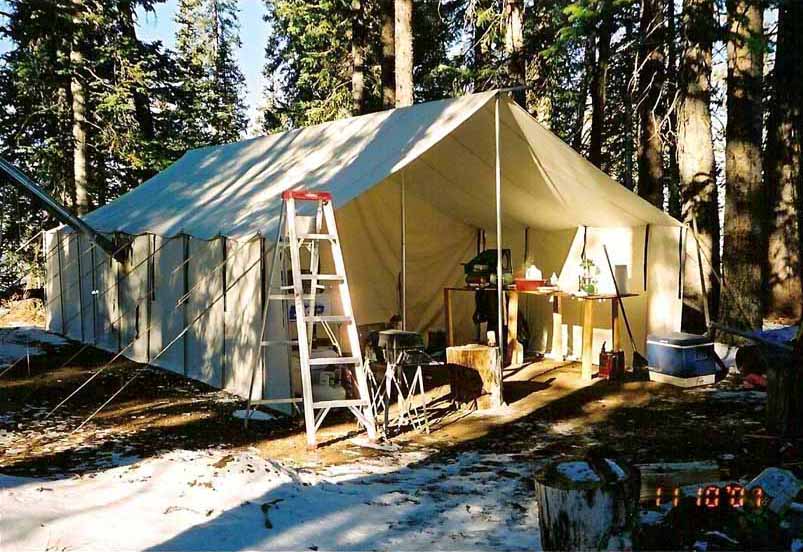
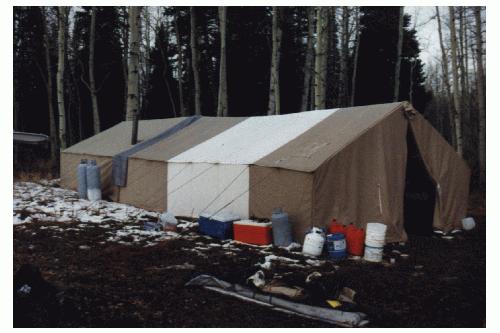
How do I prevent condensation when I use a rain fly?

In the picture above tree branches hold up the rain fly.
Eventually what “kills” canvas tents is the harmful UV. Our average end user who uses the tent a couple weeks out of the year has no problem. If you plan on setting the tent up for extended periods of time we recommend a “rain fly”. A rain fly is a plastic tarp that has a UV inhibitor built into it to prevent the UV damage. It also protects the tent top from burn holes, slides the snow, and is another barrier in the rain. To allow your tent top to breathe, the rain fly must be set up correctly.
It is O.K. to have the rain fly touch the tent at the top. But out at the sides of the tent you should use a longer pole to lift the fly up off the tent top. A couple of poles on each side is sufficient just enough to get a pocket of dead air to a large portion of the tent top.
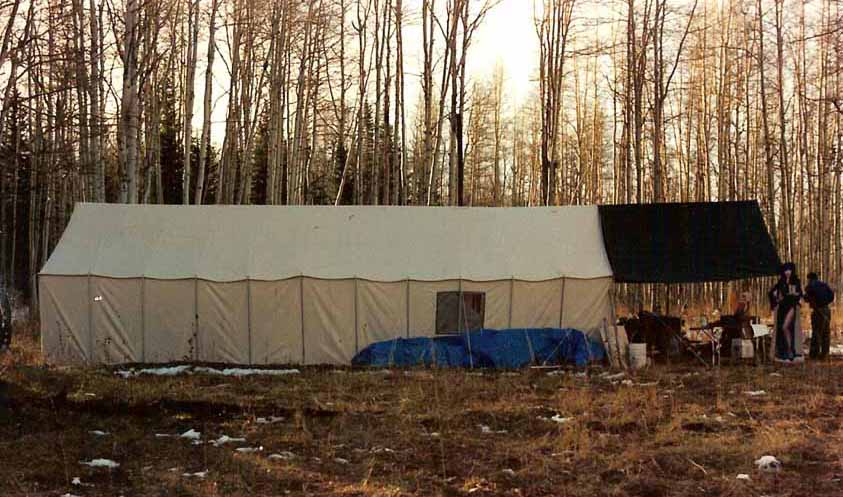
What is a "Sod Cloth"?
A sod cloth is a band of material 10″ – 15″ that is sewn in around the bottom of a tent. Its purpose is to create a seal to the ground. This is accomplished by placing sod on it (burying it) this will prevent wind and rain from entering the tent from the bottom. We use a vinyl so it is easier to clean and won’t freeze to the ground as quickly as canvas. Our sod cloth is designed to go to the inside so it will not freeze to the ground.
What should I use to waterproof my tent?
As for a “waterproofing” we don’t recommend putting anything on our tents. About the only time we hear of one of our tents leaking somebody has “retreated” it. Our canvas is so tightly woven that we very rarely hear of anybody having a problem with the tent leaking. When we do hear issues with leaking it is typically because something has been done to effect the existing treatments.
If you want to treat your tent we sell waterproofing by the gallon.
A rain fly will also keep you dry.
-
Waterproofing for Your Canvas Tent
Price range: $24.95 through $65.00 Select options This product has multiple variants. The options may be chosen on the product page -
Mold and Mildew Tent Cleaner
$24.00 Select options
What should I use to clean my tent?
We recommend a mild soap (as not to effect the treatment) like a dawn dish washing detergent or Woolite (a soft soap). To clean, set the tent up and use a soft bristle brush lightly brush the effected area and rinse well. Be sure the tent is dry before storing.
Note regarding mildew —
Once you have mildew in your tent is it always there. We can kill it to prevent it from spreading, and at the same time bleach it out so it doesn’t look so bad, but eventually the tent will wear out at those places and might start to leak their as well.
We offer a cleaner/mildew remover that will prevent the spreading of the mildew.
-
Waterproofing for Your Canvas Tent
Price range: $24.95 through $65.00 Select options This product has multiple variants. The options may be chosen on the product page -
Mold and Mildew Tent Cleaner
$24.00 Select options
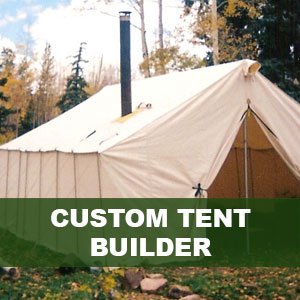
What if the tent I want isn't stock size?
This question is generally for larger wall tents (note: the example below is for larger tents, smaller tents will have a higher per sq. ft. cost which will vary depending on size & material selected).
Here is an example–
We can make whatever size you want. However, the price is determined by the fabric selected and the sq. footage of the tent desired.
- The cost for a water and mildew treated tent (over 320 sq. ft) is $2.95 a sq. ft.
- The cost for a water, mildew and fire treated tent (over 320 sq. ft) is $3.63 a sq. ft.
So for a tent 16 x 24 which has 384 sq. ft. a water and mildew treated tent would be: $1132.80
The same tent in a water, mildew and fire treatment would be: $1,393.92
That includes all of our standard features: 5′ walls, zipper door, stove jack, sod cloth, ridge pole sleeves, rope with metal tensioners and steel stakes. Any of our options would be available at normal pricing.
Camp Stoves
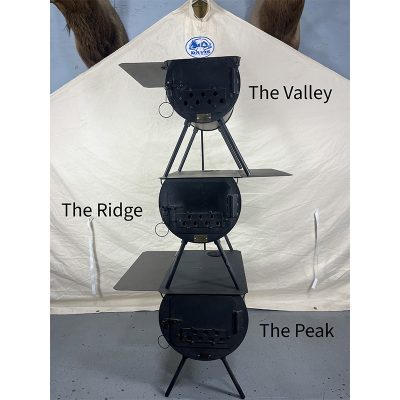
What size stove should I get with my tent?
Wow! There are so many variables involved with question, and that makes it hard to answer. Just a few of the variables are elevation, time of year, the size of tent, type of wood, how dry the wood is, how much air is feeding the fire, and your comfort level. All of these are determining factors in which stove is the best choice for you.
Our smallest stove, the Valley, is capable of heating a large tent. The question is, how long do we want to heat it? While it’s true that a small stove can heat a large tent, it can only do it for a short time before it must be restoked. It all comes down to this, the more weight you’re willing to carry, the larger stove you can get. With the larger stove, you also get a longer burn time. Much like the tents, if you’re between two sizes of stoves, go bigger. You can always start a small fire in a big stove. You’ll be happy if you get the largest stove you’re willing to pack in.
As a general rule:
Customers usually select The Valley for tents up to 10’x12′ . We use the Valley in our 12’x14′ because we pack in 6 miles where weight and size is significant. This means more stoking/adding firewood for the hunter with the weakest bladder!
The customer who typically selects The Ridge has a tent size near 12’x14′ to 14’x16′.
For any tent larger than that we recommend The Peak.
Where should I put my Stove Jack?
I like the stove by the front of the tent. It will keep the entryway dry and you don’t have to carry the firewood to the back of the tent. To me the only advantage to the right or left side is if you always set your tent up in the same place; you know which way the wind predominately blows put it on the down wind side.
Out the roof or out the wall? Both will have their advantages and disadvantages.
Out the roof is lower maintenance. The stovepipe runs vertically which means less chance of ash building up in the stovepipe and causing a fire. The roof also provides an advantage when it comes to water. Any water that comes in around the pipe is no big deal because the stove dries it instantly. But it has a tendency to put more sparks on the tent top. You can combat this with a good spark arrestor and an extra piece of stovepipe.
Out the wall will allow you to get the sparks further away from the tent (preferably on the down wind side) but requires frequent cleaning to prevent clogging and possible stove pipe fire.
How do I install a Damper in my Stove Pipe?
To install the damper you will drill, or punch (a tent spike will work) two holes in the stovepipe. Make holes just large enough for the damper wire to fit and punch these holes directly across from each other. We put ours high up in the first section of stovepipe – just far enough down to not interfere with the second stovepipe.
Then take the damper apart (push on the handle and turn notch to clear position) wiggle the bent pin all the way out of the black plate.
Once the damper is apart insert the black plate into the stovepipe and reassemble.
Note: the spring goes on the outside to provide pressure to hold the plate in place. The large springs function is to stay cool so you can adjust the damper.
General Information
How do I get to your Shop?
Davis Tent
4230 BROADWAY STREET – DENVER, CO 80216
(877) ELK-CAMP
(303) 561-1817